Easy Sticky Chicken (Better Than Takeout)
This post may contain affiliate links.

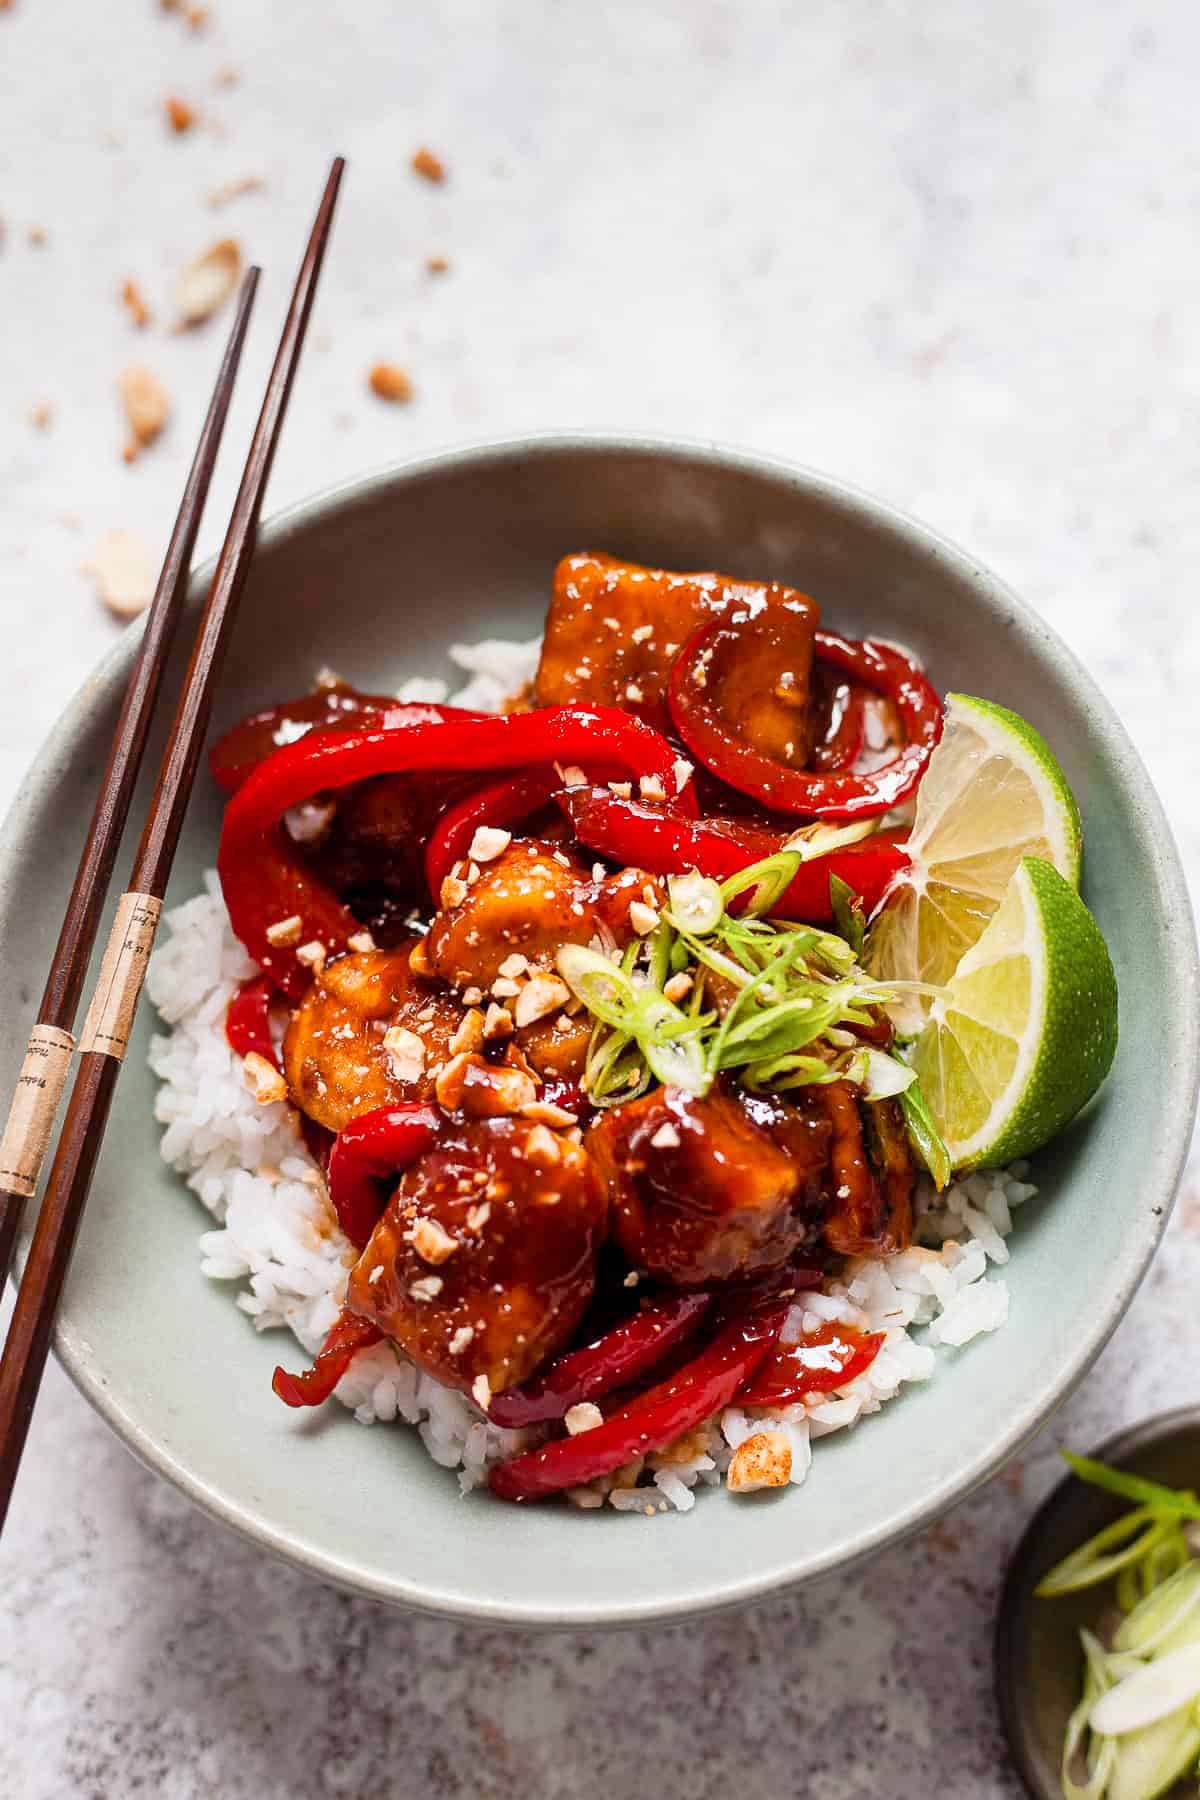
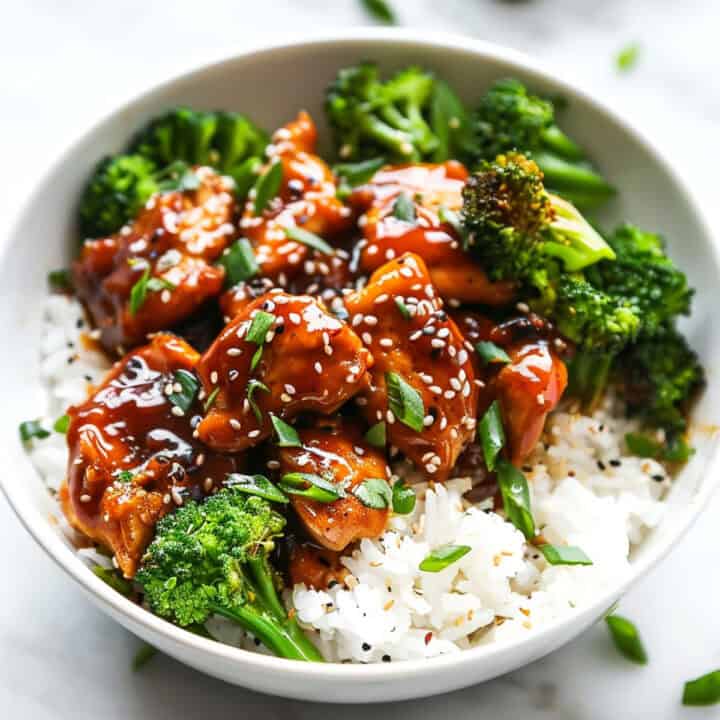
This easy sticky chicken is a quick weeknight dinner you’ll come back to again and again. The chicken is coated in a rich, sweet and savoury glaze that turns glossy as it cooks, giving you that irresistible better-than-takeout finish at home.
If you’re looking for more easy Asian-style recipes, my crispy pork belly, crispy chilli chicken, or spicy Korean chicken are all great choices!
Why this sticky honey garlic chicken works
Ingredients overview
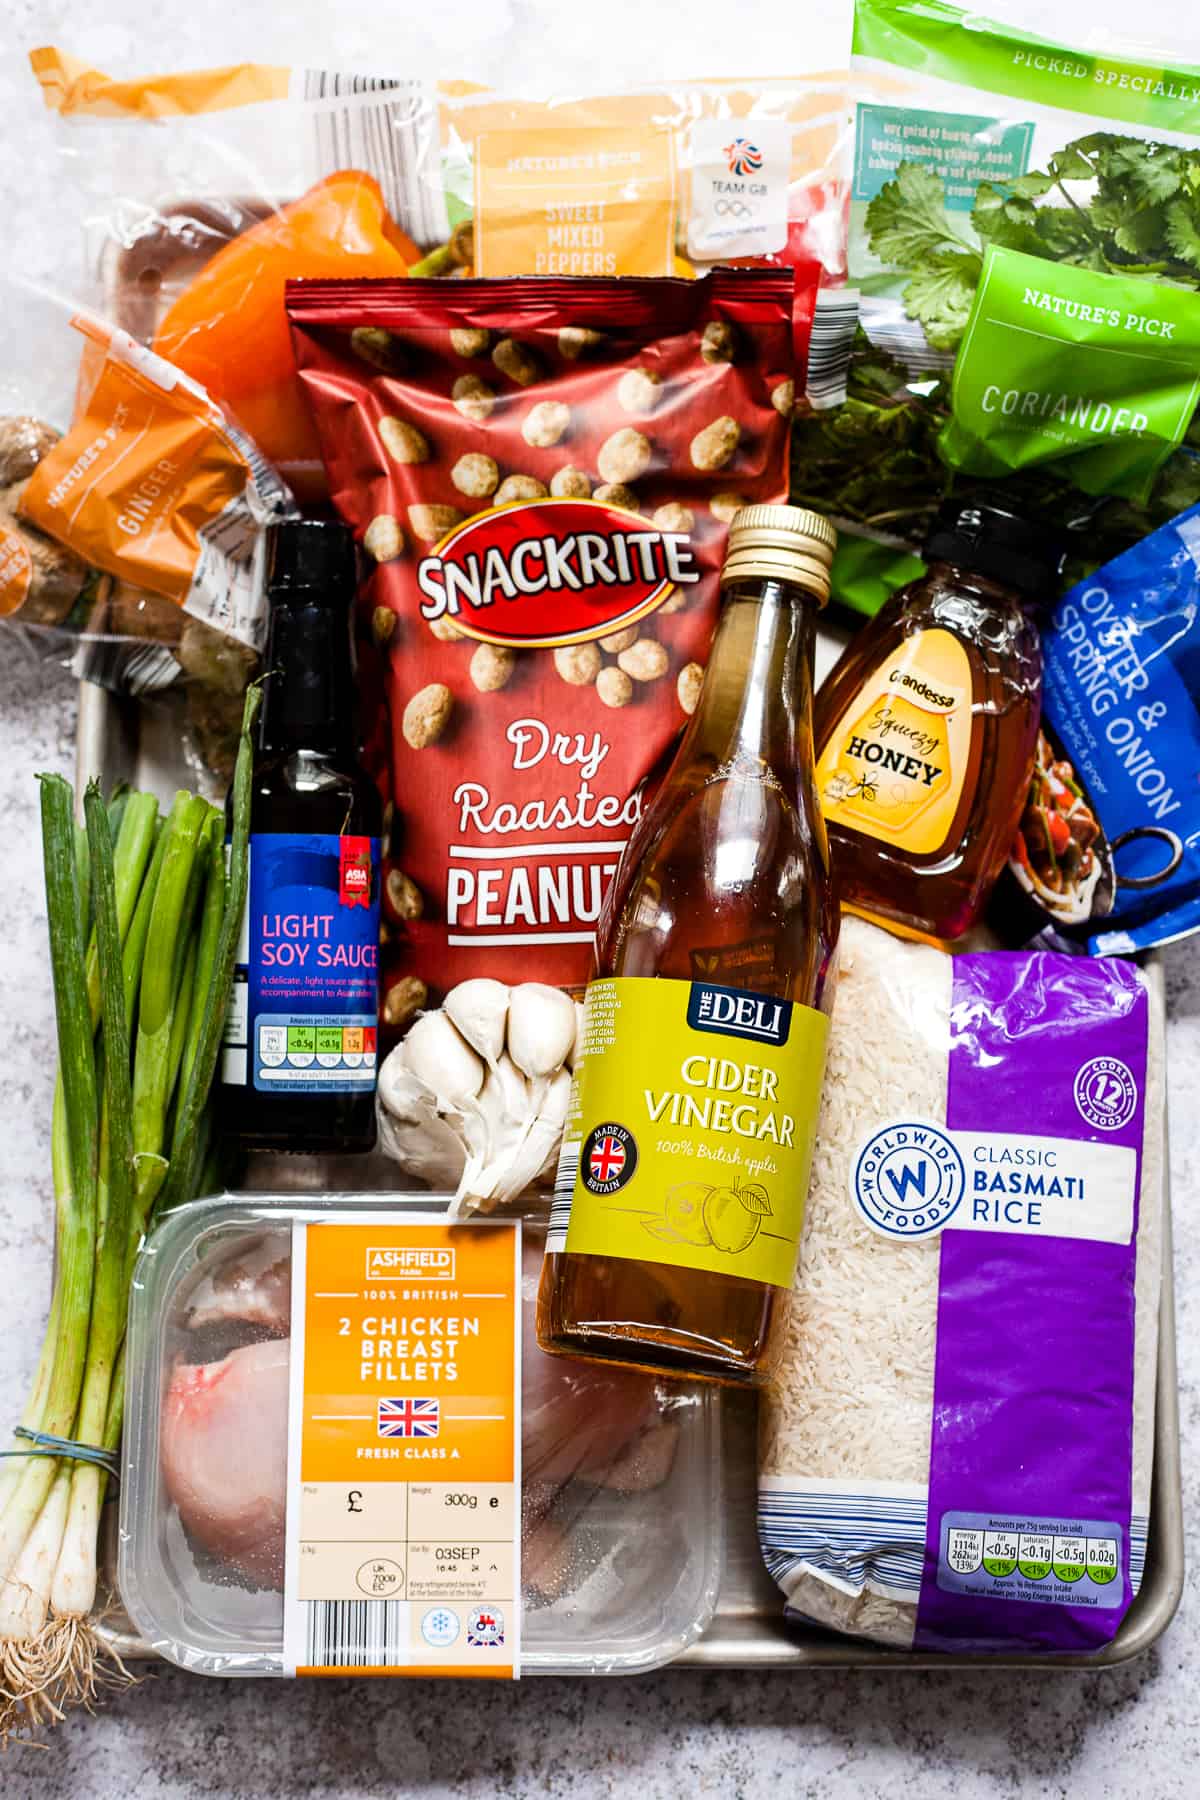
- Chicken – Chicken breast works well here and cooks quickly, making it ideal for a weeknight dinner. Cut into even pieces so it stays tender and cooks evenly. Chicken thighs can also be used for a slightly richer result.
- Garlic – Fresh garlic adds depth and balances the sweetness of the sauce.
- Soy sauce – Brings the savoury, umami base to the glaze.
- Honey – Adds sweetness and helps create that sticky, glossy finish.
- Ketchup – A simple way to add tang, sweetness and body to the sauce.
- Brown sugar – Enhances the sweetness and helps the sauce caramelise slightly as it cooks.
- Vinegar – Adds a touch of acidity to balance the richness of the sauce.
- Oyster sauce (optional *see ingredient notes in recipe card) – Adds extra depth and richness to the sauce with a savoury, umami flavour. You can leave it out if preferred—the sauce will still be delicious.
- Cornflour (cornstarch) – Used to coat the chicken, giving it a light, crispy exterior and helping the sauce cling to each piece. You can add a little extra at the end if needed to thicken the sauce further.
- Oil – For cooking the chicken and helping it brown.
Be sure to check out the full recipe and ingredient list below
How to Make Sticky Chicken
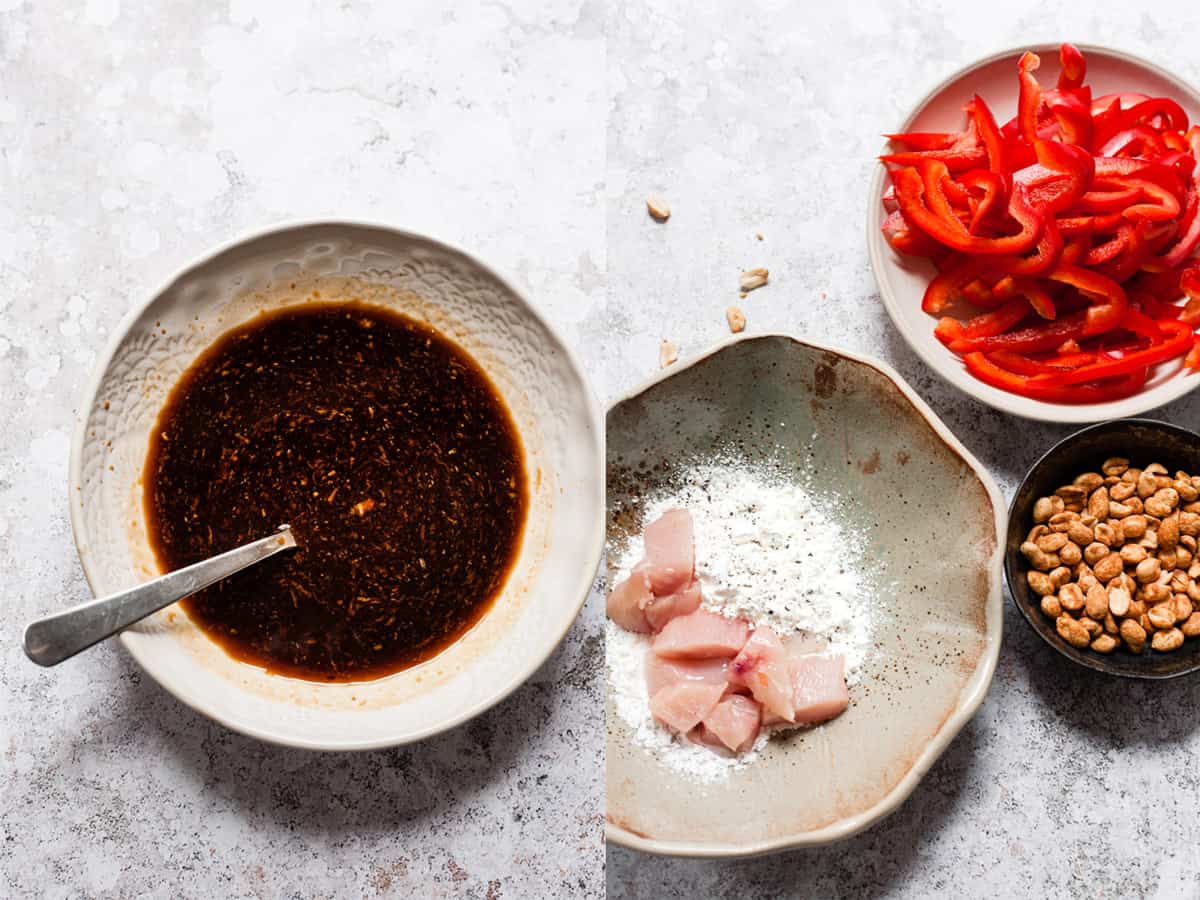
Step 1: Coat the chicken
- Cut the chicken into even bite-sized pieces.
- Toss with cornflour, salt and pepper until lightly coated.
Step 2: Make the sauce
- In a small bowl, whisk together the soy sauce, honey, vinegar, garlic, ginger and optional oyster sauce until smooth.
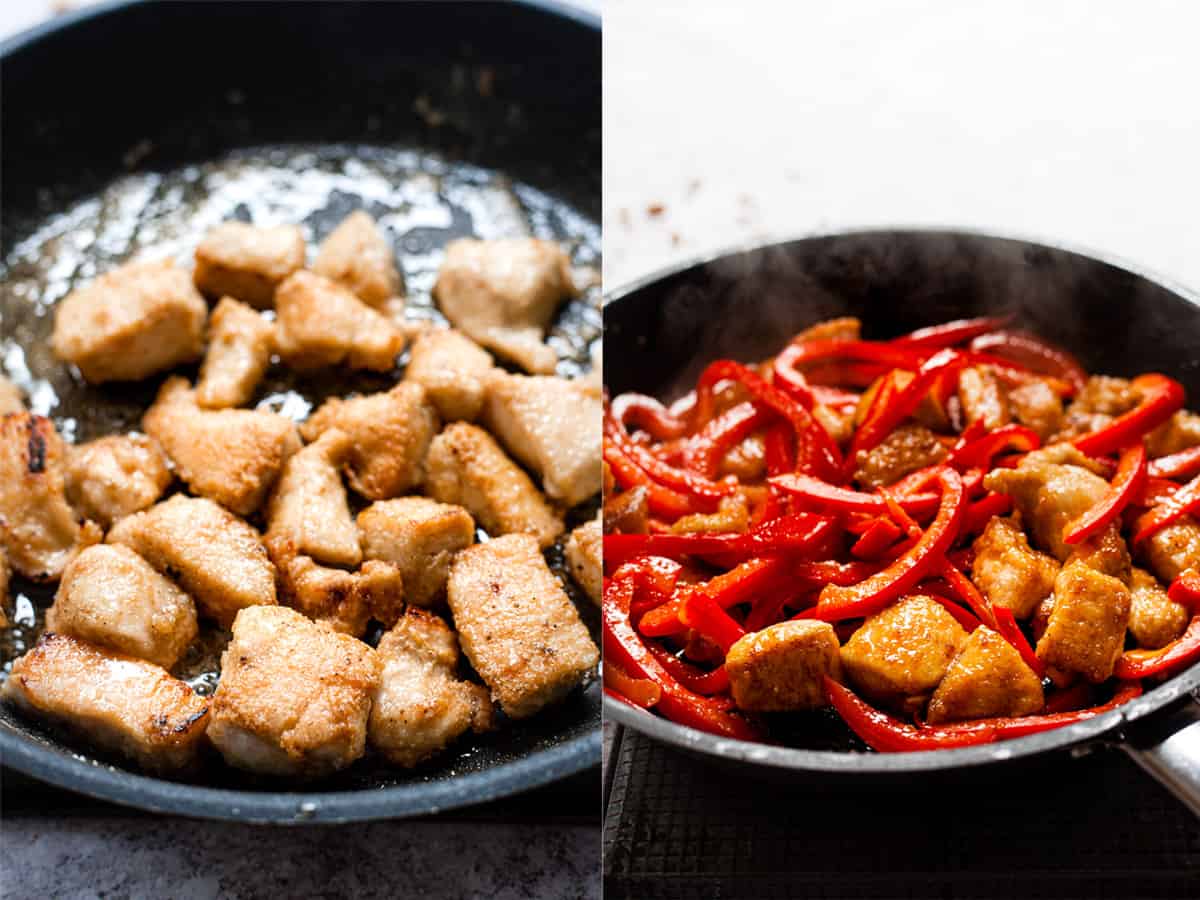
Step 3: Cook the chicken until crisp
- Heat oil in a large pan over medium-high heat.
- Add the chicken in a single layer and cook until golden and crisp on the outside, turning as needed.
Step 4: Add the peppers
- Add the sliced red peppers and cook for a couple of minutes until just softened.
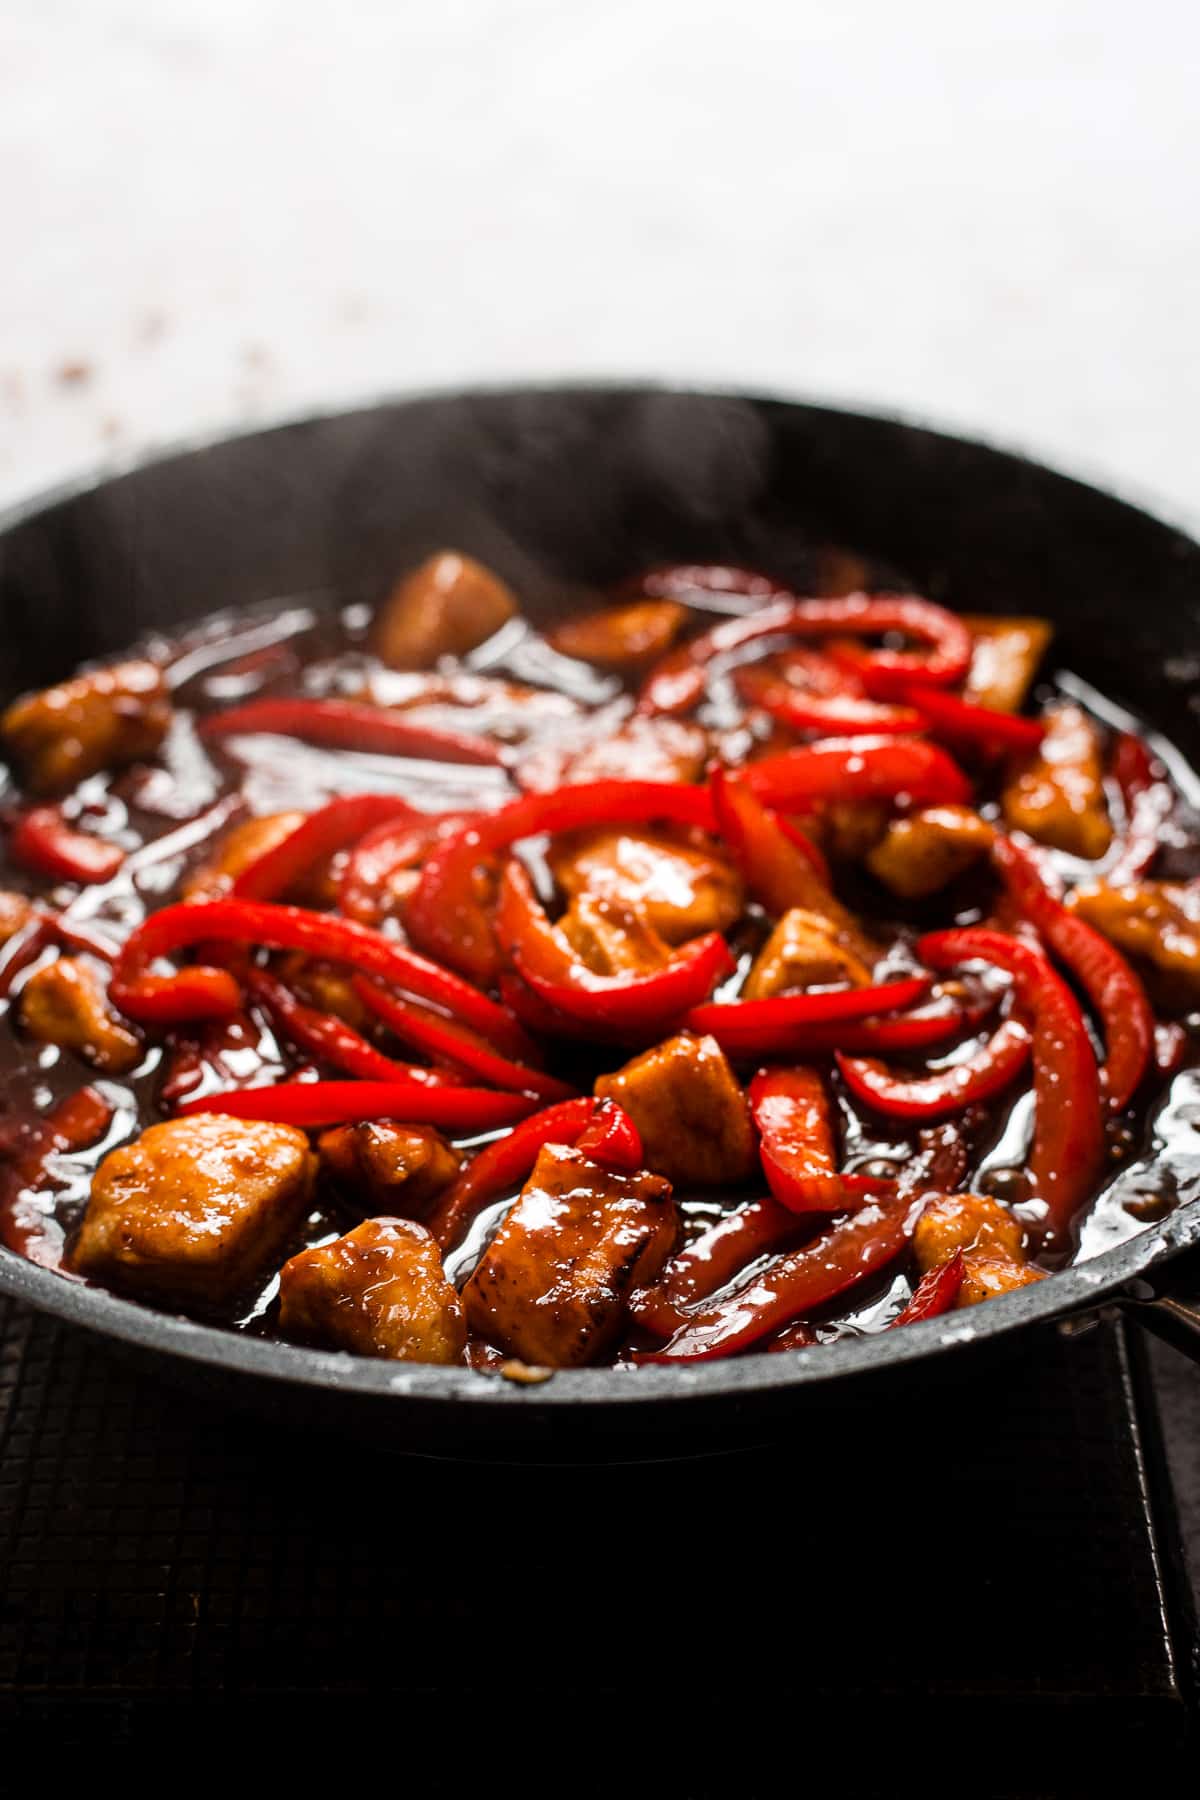
Step 5: Add the sauce and finish
- Pour in the sauce and stir to coat the chicken and peppers.
- Simmer until the sauce thickens and turns glossy, coating each piece of chicken.
- The sauce should be thick, glossy and clinging to the chicken.”

Chef’s Guide: Expert Tips
Here are a few simple tips, drawn from my training and kitchen experience, to help you get the best results every time.
- Don’t overcrowd the pan: Cook the chicken in a single layer so it crisps up properly. If the pan is too full, it will steam instead of brown.
- Let the chicken develop colour before turning: Give it time to form a golden crust before moving it. This is what gives you that crispy texture.
- Keep the heat medium-high: Too low and the chicken won’t crisp, too high and the coating can burn before it cooks through.
- Add the sauce at the end: Pouring the sauce in once the chicken is cooked keeps it glossy and sticky, rather than thin or watery.
- Adjust the sauce to taste: If it’s too sweet, add a splash more vinegar. If you want it richer, a little extra soy sauce works well.
- Use oyster sauce for extra depth (optional): It adds a deeper savoury note to the sauce, but the recipe still works well without it.
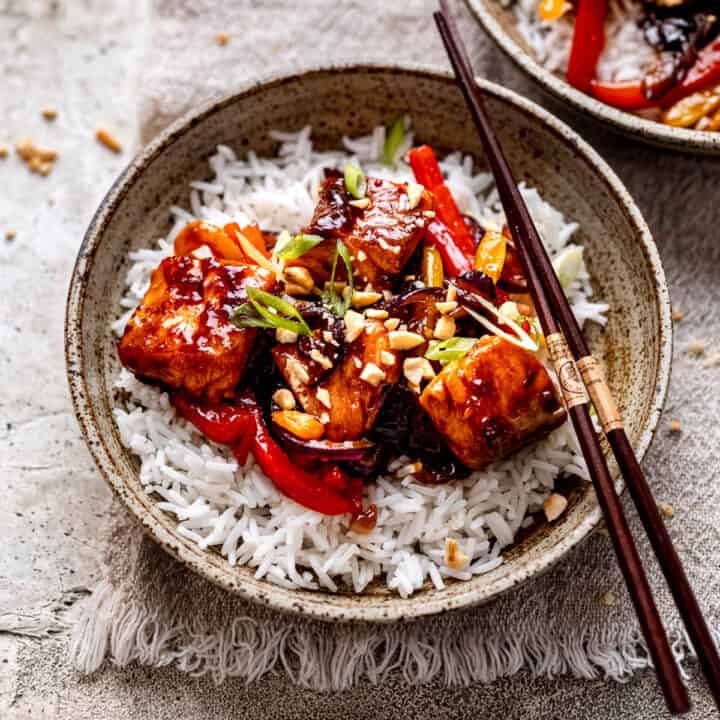
- Try it with prawns or tofu: This sauce also works well with prawns or firm tofu—just adjust the cooking time so they don’t overcook.
Storing and reheating leftovers
- Fridge: Let the sticky chicken cool completely, then transfer to an airtight container and store in the fridge for up to 3 days.
- Reheat: Reheat in a pan over medium heat until hot throughout. Add a splash of water to loosen the sauce if needed.
- Freezer: Not ideal for freezing, as the sauce can lose its texture and the chicken may become slightly tough once reheated.
Recipe FAQ’s
The sauce reduces as it cooks, thickening into a glossy glaze that clings to the chicken. The combination of sugar and soy sauce creates that classic sweet and savoury sticky finish.
Coating the chicken in cornflour and cooking it in a single layer over medium-high heat helps it develop a light, crispy exterior before the sauce is added.
Yes, chicken thighs work well and will give a slightly richer flavour. Just adjust the cooking time slightly to ensure they are cooked through.
You can cook it ahead and reheat it when needed, but it’s best served fresh while the sauce is glossy and the chicken is at its crispiest.
The chicken should be cooked until it’s no longer pink inside and the juices run clear. An internal temperature of 165°F (75°C) as measured with a meat thermometer ensures it’s safely cooked.
The sauce will naturally thicken as it reduces, but if you’d like it thicker, you can add a small amount of cornflour mixed with water towards the end of cooking.
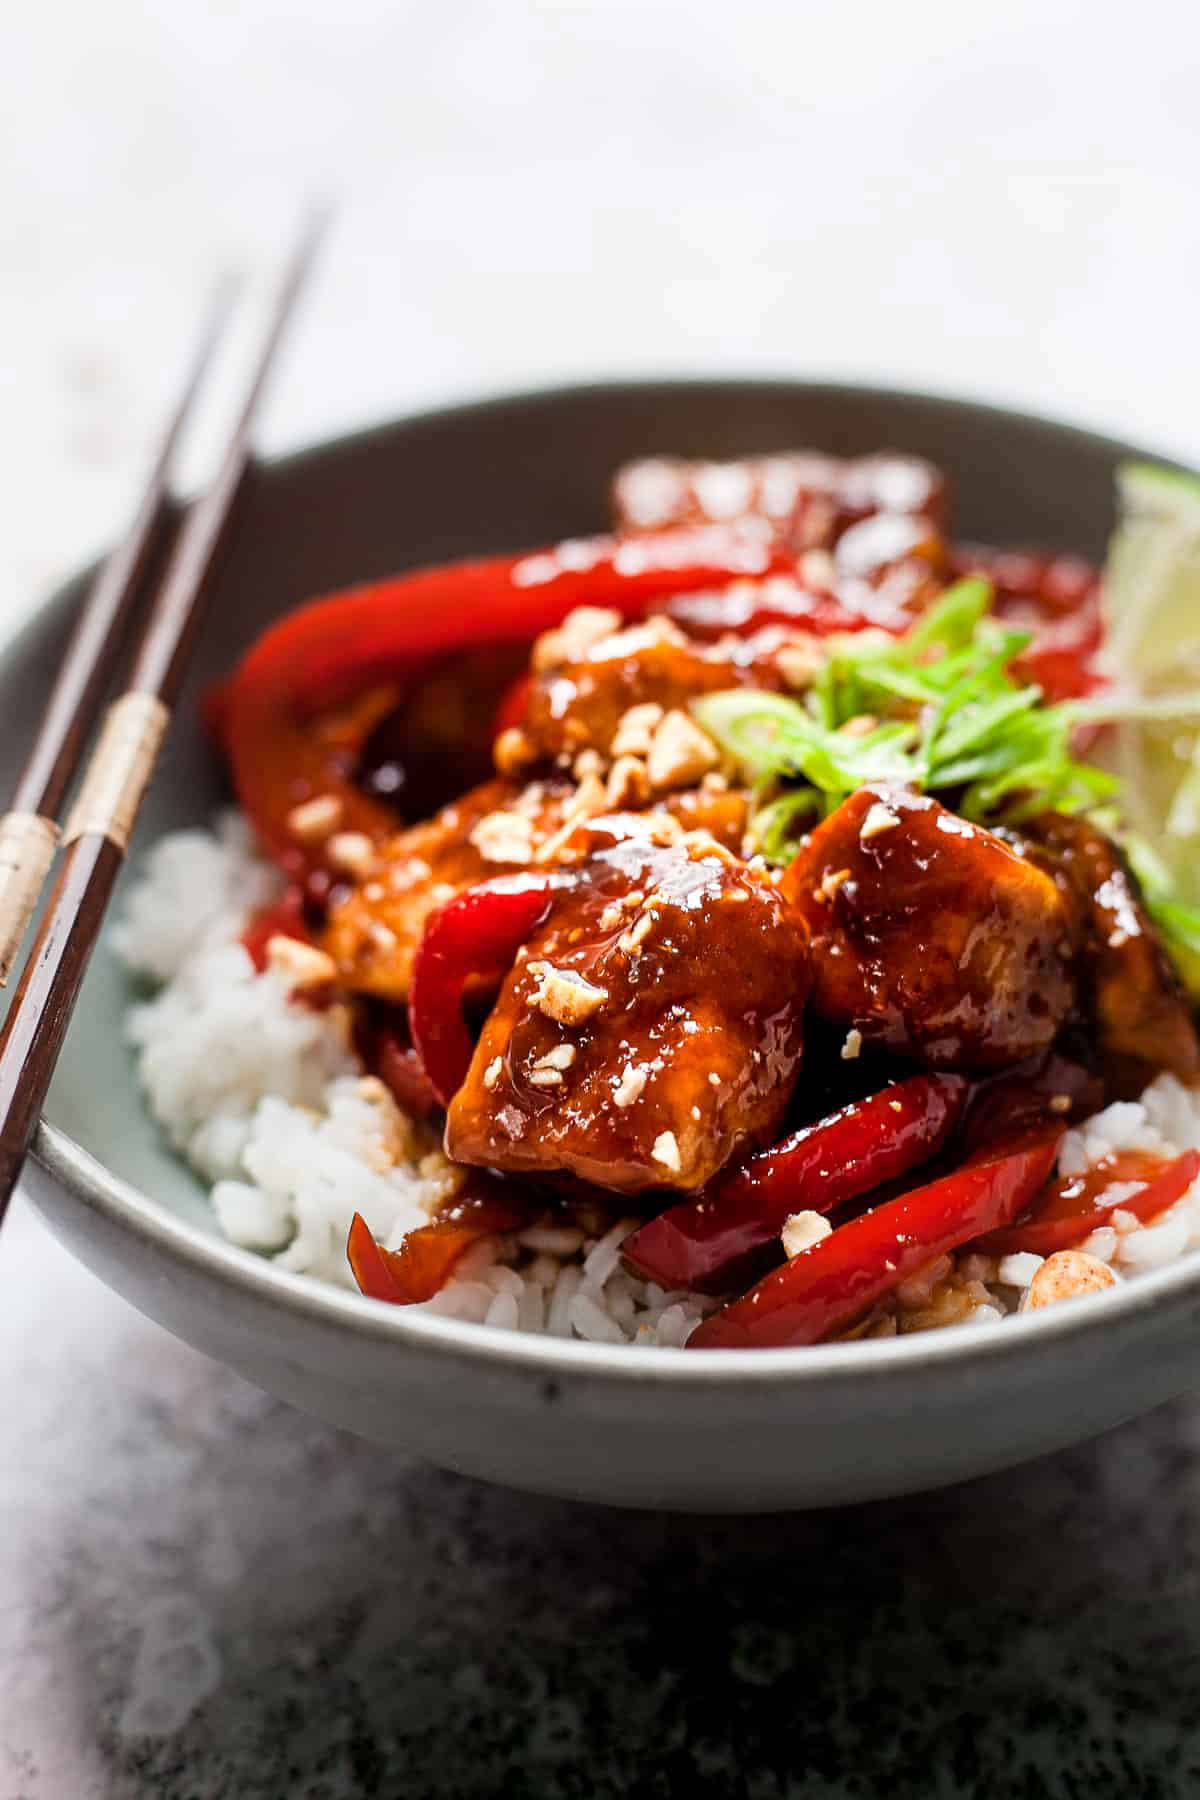
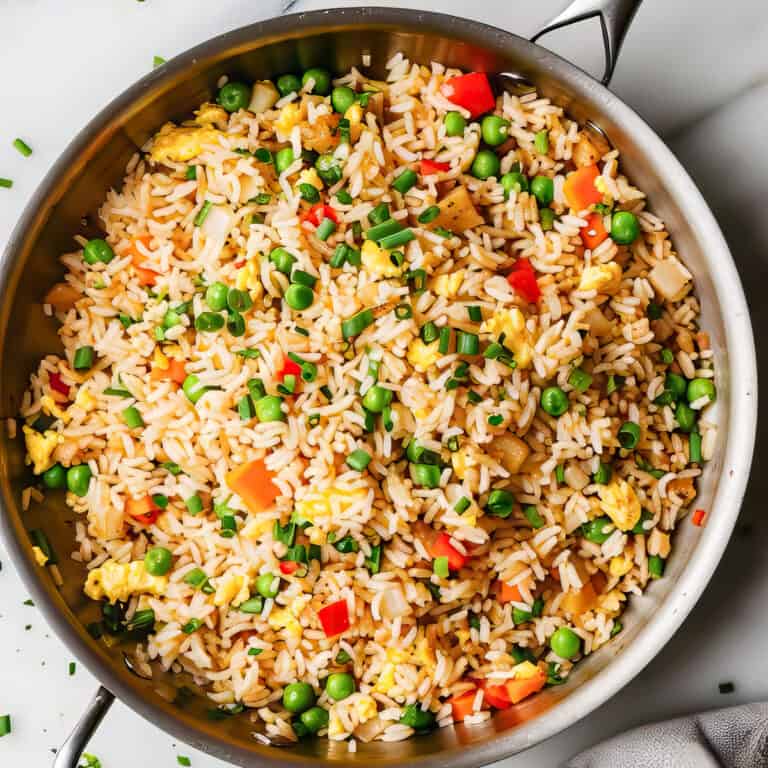
Serve with rice, noodles or steamed vegetables for a simple, balanced meal that works well for weeknights.

If you tried any of these recipes, please let me know in the comments below, and leave a star rating while you’re there!
For more recipe ideas, follow us on Pinterest, Facebook, and Instagram, and join our exclusive Facebook group.
For meal planning assistance, check out our weekly Aldi-only meal plans, free for subscribers.
Craving more comfort food? Visit our sister site, Salted Mint, for easy, delicious recipes with everyday ingredients.

Easy Sticky Chicken (Better Than Takeout)
Ingredients
For the chicken
- 500 g (1 lb) boneless skinless chicken breast, cut into bite-sized pieces
- 2 tablespoons cornflour, cornstarch
- Salt and black pepper, to season
- 2 tablespoons vegetable or olive oil
- 1 red bell pepper, thinly sliced
For the sauce
- 60 ml (¼ cup) soy sauce
- 60 ml (¼ cup) honey
- 1 tablespoon white wine vinegar
- 2 –3 tablespoons oyster sauce, optional – see notes
- 2 cloves garlic, minced
- 1- inch piece fresh ginger, grated
For serving (optional)
- Cooked rice
- Chopped peanuts
- Sliced green onions
Instructions
Coat the chicken
- In a bowl, toss the chicken pieces with the cornflour, salt and pepper until evenly coated.
Make the sauce
- In a small bowl, whisk together the soy sauce, honey, vinegar, oyster sauce (if using), garlic and ginger until smooth.
Cook the chicken
- Heat the oil in a large pan over medium-high heat. Add the chicken in a single layer and cook until golden and lightly crisp, turning as needed.
Add the peppers
- Add the sliced red pepper and cook for 2–3 minutes until just softened.
Add the sauce and finish
- Pour in the sauce and stir to coat the chicken and peppers. Simmer for a few minutes until the sauce thickens and turns glossy, coating the chicken.
Serve
- Serve immediately with rice and garnish with chopped peanuts and green onions, if desired.
Notes
- Oyster sauce substitute: If leaving out the oyster sauce, add 1 tablespoon extra soy sauce and 2-3 teaspoons ketchup or hoisin sauce to maintain depth and balance.
- Crispy chicken tip: Cook the chicken in a single layer and avoid overcrowding the pan so it browns properly rather than steaming.
- Sauce consistency: The sauce will thicken as it simmers. If it becomes too thick, add a splash of water to loosen it.
- Alternative proteins: This recipe also works well with prawns or firm tofu—just adjust the cooking time accordingly.
Nutrition

Meet the Chef!
Hi, I’m Debs, a Cordon Bleu-trained chef dedicated to helping you create unforgettable meals on a budget. Discover more about my journey and dive into a world of foolproof recipes designed for those who love to eat well without overspending.


Such a quick and easy recipe.
We liked the taste of the sauce, thank you! but it was too salty for us. Do you think I can reduce the soya sauce? But if I reduce it wouldn’t it then be a bit dry? I also added a bit of lime to offset the saltiness. Thank you! 🙂
Hi Miriam, I would reduce the soy sauce and add in some water or chicken stock to make up the difference in the liquid. You can also try with reduced sodium soy sauce if you can find that too. Any of those options will help to reduce the salt content. And that extra lime juice will help too. Thanks so much for taking the time to leave a comment and review. It’s so appreciated! 🙂
Can this dish be prepared in advance?
Is it possible to make the sauce and freeze it?
I’ve family coming and thought it would be great dish to serve, but I’m on my own and don’t want to spend the time in the kitchen!
Hi Jen! This chicken is best served fresh, but there are a couple of things you can do to make it really easy when you’ve got family over. So, yes. You can make the sauce ahead of time and freeze it. And what I would suggest, before family arrive you can chop the chicken into chunks, measure out the cornstarch and slice the bell pepper. That will make the recipe really easy to pull together when you’re ready. It can be made slightly in advance like 2-3 hours but not much more than that, otherwise the chicken will won’t stay crispy. Hope that helps and let me know how it goes! 🙂
Hi, could I ask for the seasoning ingredients that’s used for the cornflour. I’m new to cooking, thanks Joe
Hey Joe! It’s just salt and pepper for this recipe. It helps to get the seasoning on every layer of cooking. When we add salt to a recipe just at the end of the cooking process, then the dish usually tastes “salty”. But when it’s added bit by bit in layers it builds “seasoning” which allows all the other flavors to shine through. So, for this recipe it’s just salt (about 1 teaspoon will do it) and a pinch of pepper, but for other recipes, you can add in other spices. If you’ve got any cooking questions just let me know. Always happy to help people become more comfortable in the kitchen. 🙂
A fantastic easy meal, I too have made it twice this week. I sprinkled sesame seeds over the top – it looks and tastes amazing
Love the addition of sesame seeds! So happy you liked it. Thank you for taking the time to leave a comment and a rating. It’s very appreciated. 🙂
Absolutely loved this recipe. Made it twice in the last week!
Didn’t use the oyster sauce but added a red chilli to the soy and must say it was lush. Served it with noodles and pak-choi. Was a lush meal and will certainly cook again 😋
Amazing! Thanks so much for taking the time to leave a comment and a rating. It’s so appreciated! 🙂
Absolutely lovely! I have added some finely chopped carrots and sweetcorn as well. I would just adjust the amount of soy sauce and use half the amount if adding oyster sauce. Otherwise really lovely and restaurant worthy.
Thank you so much! Your additions sound amazing! Thanks for taking the time to leave a comment and review!
Is the oyster & spring onion sauce mix something that was only at Aldi’s for a short time? I went there and could not find anything like it. Even asked a store employee. Is this something I could find elsewhere?
Ahhhh, I see you are in the UK and buying from Aldi UK stores. I am in the USA, so that is probably why I couldn’t find the oyster sauce.
Hi Vicki. For this recipe, you can skip the oyster sauce and up the amounts on the sauce. So, extra soy sauce etc. The oyster sauce just helps to deepen the flavour but it’s not required. Let me know if you make it!